
There are so many benefits to lunging your horse. Lunging can help quiet down an excitable horse, it can help a horse learn to balance himself, and help you to “work out the kinks” before you get on his back.
But to get the most out of lunging, it helps to get your horse moving in different directions more frequently than having him run around you in circles. But to do that correctly, you need to be able to have the lunge line on whichever side he is moving around you.
If you have the lunge line attached to one side of the bit, you can’t make him go the other direction unless you stop him and change your set up.
One way to get around this is to attach a lunging strap to your bridle, or halter, whichever you are using.
To Buy or Not To Buy….
I looked at buying one on eBay, but I couldn’t pull the trigger. Instead of buying one, I decided to make one. I had the idea in my head, and I also had all of the materials I would need to make one (or 3) so I decided to do it. And you know what? It was really simple to do! And I want to share with you how I did it.
How to Make a Lunging Strap for Horses
What you will need:
- Nylon webbing
- (2) Bolt snaps
- Heavy duty 1 ½” ring or D ring
- Sewing machine
- Thread
- Scissors
- A lighter
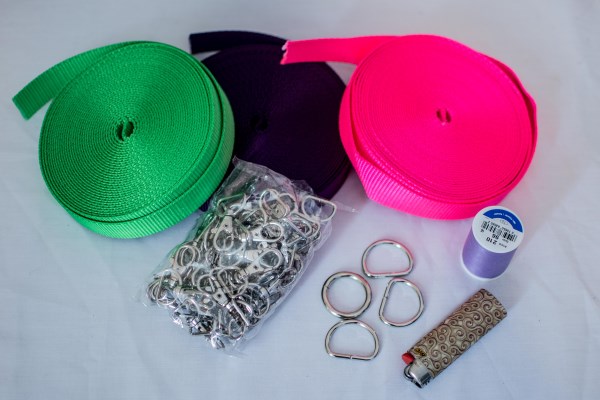
All the materials I used for this I already had. I have no idea of why I had 3 rolls of webbing, but I did. So I had to figure out a way to use it, and making a lunging strap was a good first step to using it up! I found the hardware I needed at Home Depot in their rope section.
Getting Started
To get started, cut 3 strips of webbing. For mine, I cut 2 pieces 8” long, and 1 piece 7” long. You can be approximate though, because you can adjust this as you go. And if your straps are too long, you just cut off the excess material. I would advise you to keep the 2 top portions of webbing to be of equal size though.
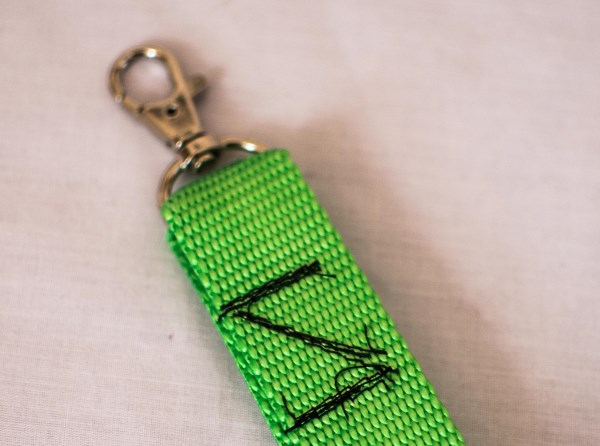
Once you have cut the webbing, burn the edges with a lighter so they don’t fray. And then you will attach a bolt snap to 2 pieces of your webbing. When you attach the snap, be sure to give yourself at least 2” of material to sew. If you don’t give enough, the strap will not be as sturdy, and it could break when you are using it if your horse gets a little to rambunctious. You will attach a snap to 2 pieces of your webbing.
Let’s Get Sewing!
When you are sewing these straps, be sure to sew twice across, at the top and bottom of the overlap of the webbing, and then sew at a diagonal. It should look like a “Z” when you are done.
After you have attached the snaps, on the third strap attach your D ring, or circle ring. There is no right or wrong type of material to get for this, as long as it is strong. The D ring is a little easier to attach though. Duplicate the same stitching for this piece of hardware like you did the bolt snaps.
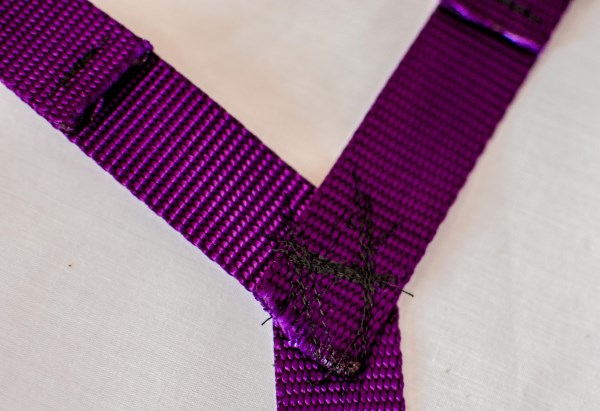
Now that your hardware is attached to each piece of webbing, now is when you will attach them all together. You will put the 2 snap pieces of webbing to form a “V”. then carefully stitch them together where they join, at the V. You will have a little excess material off to the side, and I would recommend you cut it off once you have sewn the two pieces together, it just looks better. Be sure to stitch these two webbing pieces like you have done before to make it as strong as it can be.

After you have the stitching all done, use your lighter on the area where you cut some of the webbing to prevent fraying.
Now you just have to attach the third piece of webbing. When attaching it, you want the D ring to be at the bottom. You will sew the plain side (without the hardware) to the V section of your 2 other pieces of webbing. Again, be sure to sew over this several times so you will have as much strength as possible for the strap.
And you have just completed your very own lunging attachment for your horse!

Watch The Video
If you are a visual learner, I made a video on my YouTube channel, The Budget Equestrian.