Make Wall Art With Breyer Model Horses
Before I get into the project, I have to say I LOVE model horses. They are so pretty, and I could just stare at them for hours. And when I was little, I used to play with them for hours. This is probably why I still love them, memories from my childhood. But as I told you in an earlier post, I can’t see having rows upon rows of model horses. So I decided to buy a few and make wall art with Breyer model horses. This was a really fun project, and pretty easy to do.
I was able to make this in a weekend. Most of the time was reserved for having the paint dry. So if you are thinking about making this, allow plenty of time for your spray paint to dry before making the art. And when you are cutting the models in half, you will have 2 pieces for every horse that you cut. This means it is possible to have 2 complete pieces of art in a weekend.
What You Will Need
To make this wall art, you will need:
- Model horses (I used the classic size)
- A piece of wood (I used 1 x 4 wood left over from another project)
- Glue gun
- Glue sticks
- A serrated knife
- Floral dry foam
- Spray paint (I used glossy white)
- Hacksaw
What You Will Do
Before you get started, clean your models. I have found that if the models are older, they probably have been cleaned with dusting polish. This makes it really challenging to get the spray paint to adhere to the model. So start with a clean horse.
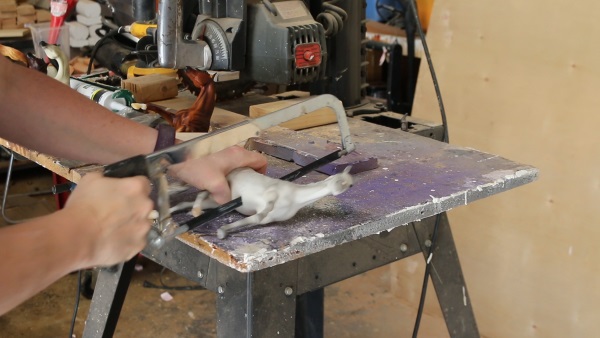
Now it is time to cut the model in half. Don’t worry, it isn’t hard to do. Just be sure to keep your finger out of the way when you are cutting the horse. My husband suggested using a vice, but I couldn’t find it. So I resorted to just holding the models while I cut them.
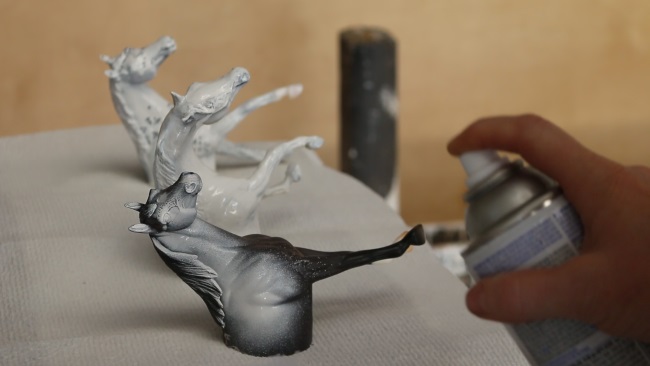
Once the models are cut, put down something for them to set on. I just used paper towels. Then spray paint the models. You will need to do multiple light coats of paint for the best results. Be sure to get every side of the horse. Allow the horses to fully dry. I let them dry overnight to make sure the were really, really dry before moving on to the next step.

While my models were drying, I stained the wood. If you have an old weathered piece of wood, this would look great. But I only had scrap wood, so I made some stain with apple cider vinegar, steel wool, and coffee grounds. I painted on several coats of my homemade stain, and set the board outside to dry. Once the wood was dry, I did drill some holes in the back of the board so I would be able to hang the art on the wall.
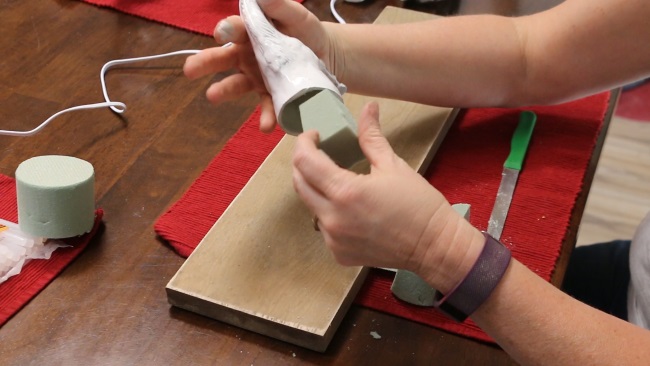
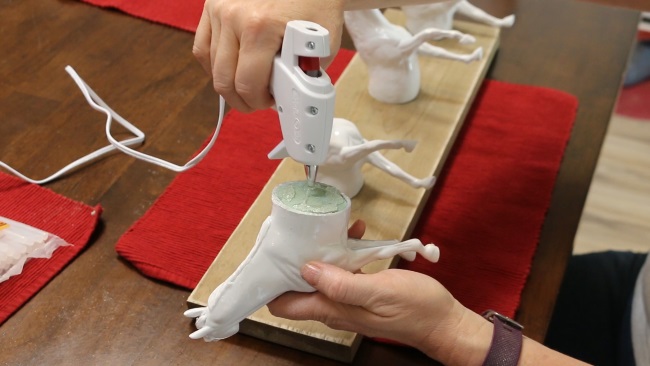
After the models have had enough time to dry, grab your dry floral foam. The dry foam is very easy to work with and cheap. I found mine at Walmart for $2.00. You want to cut the foam down so you can fill in the hollow section of the horse. This will give you a larger surface area for the glue to stick too. Push the foam into the hollow area of the model and trim off any excess foam.
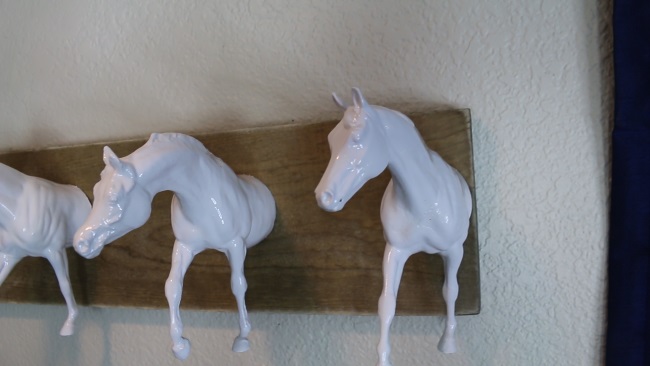
Then position the horses on your piece of wood.
Apply glue to the foam, and the horse itself and attach to the wood. Be sure to only use a small amount of glue on the outer edge, otherwise you will see it protruding from the sides of the horse.
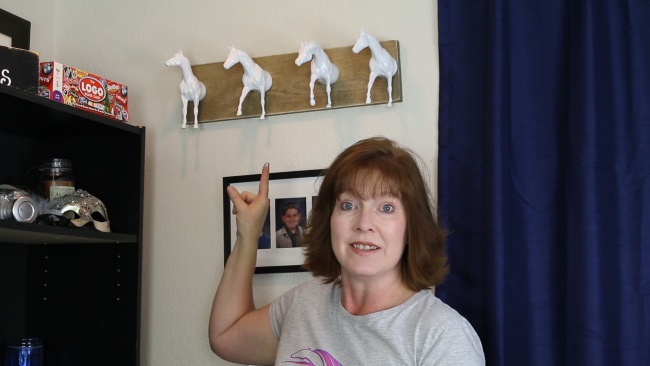
Enjoy Your New Art
Once you have attached all of the horses, all that is left to do is to hang up your wall art! Wasn’t that easy?!?
If cutting the horses scares you, don’t worry. It is very EASY to do! If you are a more visual l;earner, I made a video showing you step by step how to make this, and you can watch it on my YouTube channel, The Budget Equestrian.

Once you see how easy this is to make, and you get over your aversion to cutting a Breyer in half, you can create some really unique equestrian art for your home. And just think of what a great gift this would be for your favorite equestrian! The holidays are coming, and this might be the perfect thing for you to make for your favorite horse person.