The turkey dinner is done, all of the family has gone home, my book is published, and Black Friday is over. Do you know what that means? It’s time to decorate for Christmas! And this is how I do Christmas decorating – DIY style!
I love to decorate for Christmas. It takes me about a day to get everything up, and put away everything else that the decorations are temporarily replacing. And even though it felt strange not to be riding Frisby on a weekend, I stayed busy with my decorating.
And forgive me that this isn’t a horsey related post, but a lot of the decorations I have for Christmas are ones that I have made, and I like to take pictures of them!
Let the Decorating Begin!
I got a late start on the decorating because Friday was busy with getting up my huge post on Black Friday shopping, and getting everything in order for my book to officially go on sale, and to wrap up both No Stirrups November challenges I was participating in.
So I had a lot going on. Thankfully, I had requested Friday off from work last March, so I was able to do all of this without feeling rushed. But I still ran out of time.
The process always starts with bringing on all of the bins from my little red barn. That is where the Christmas decorations live for 11 months out of the year. A week ago I told myself to bring in a bin every time I go out to the barn. But that didn’t happen. So first things first all of the bins had to come inside.
And then one by one, I emptied the bins and put up all of the decorations. And here is the end result….
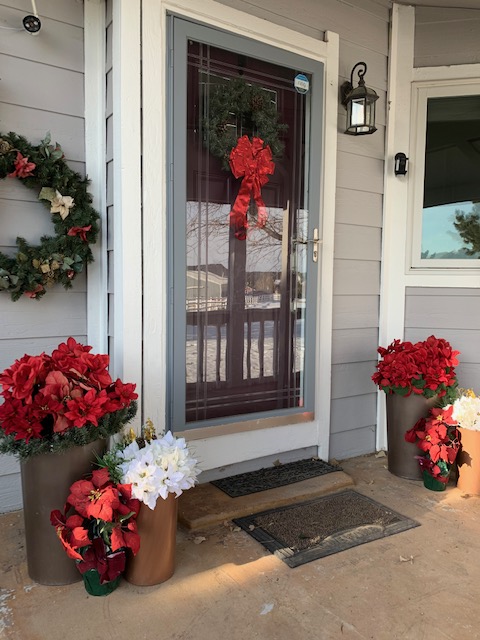
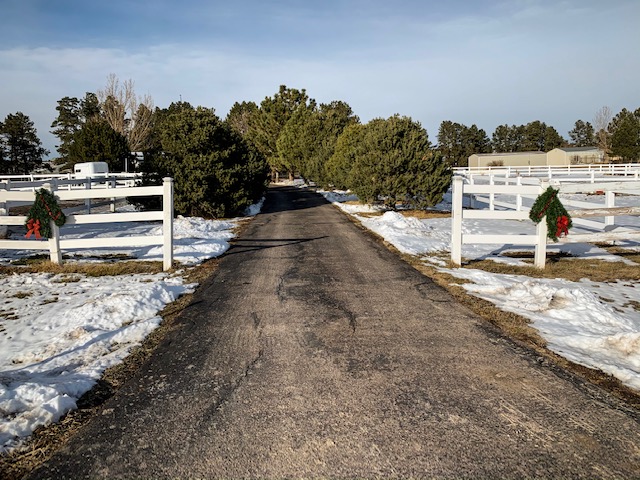
Starting at the front, I replaced my artificial flowers for Thanksgiving with a more suitable red and white combination. I think it fits in well with the big red bow on the door wreath.
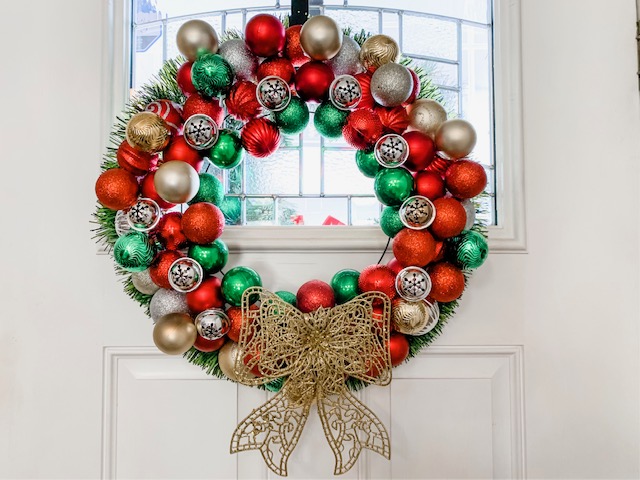
And inside, this is the wreath I made last Christmas with everything I bought at the dollar store. I love this wreath! It’s very sparkly and happy. And everything on this wreath came from the dollar store.
I think it cost me around $12.00 to make this festive ornament wreath. And it was worth every penny.
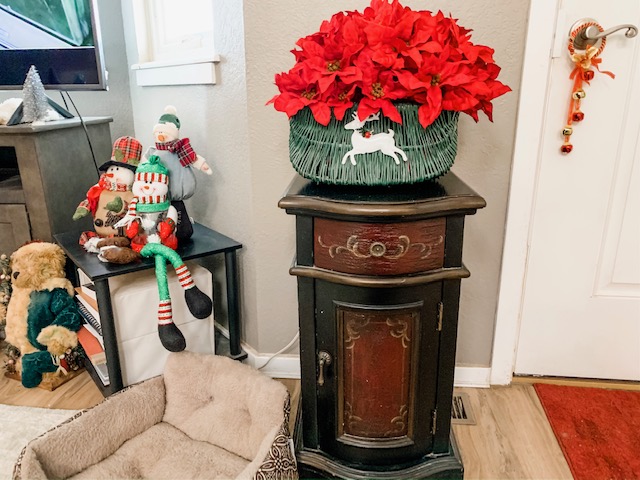
Pardon the doggy bed in the foreground. I found this green basket at Goodwill for $.99 and then filled it with flower bunches I got from Walmart. While I did look at the dollar store, the Walmart flowers were bigger, better and cheaper.
It’s also worth mentioning the little stand that the flowers are sitting on was a piece of furniture I got for free from a friend who had found it when someone was going to throw it away.

And, more flowers! The container was my anniversary present from my husband last year. It is not a bargain, it’s from Pottery Barn. But I love it. So I change out the floral arrangement several times a year.
I found the flowers at Walmart and the clearance section of Michael’s . And the little horse? Well that’s a Christmas ornament that I got at Walmart for $0.97.

Then we move over to a table against a wall that breaks up the open area from the living room to the dining area. This is a wooden box I made with scrap wood. I keep rectangular Styrofoam in it and then change out the flowers for the seasons.
Again, all of the flowers are from either the clearance section of Michael’s or Walmart. And a quick tip, the flowers I got at Walmart were bought AFTER Christmas. Because you can find them for 90% off! So after every seasonal holiday, I will go and buy as many flowers as I can because I will use them. This is how I get great deals on flowers I use for my horse jumps that I build.
And the place mat, well that came from the dollar store.
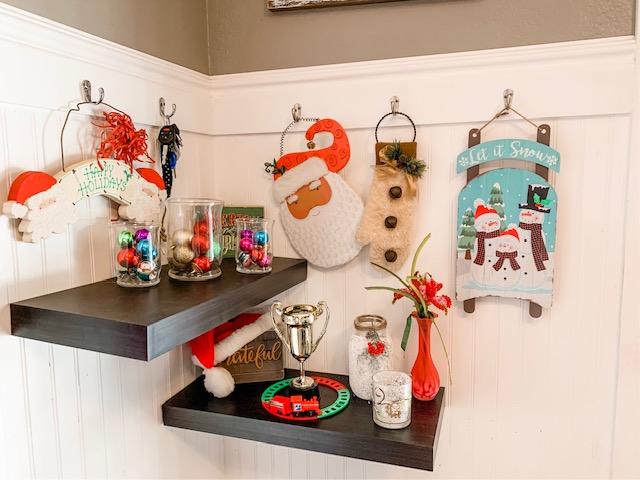
When I’m decorating for the holidays, I love to create little vignettes. So a corner with shelves gets busy with lots of different pieces that I have collected over the years. Some were gifts, some were left overs from decorating. And the Santa hat over my grateful sign is actually a horse hat that I got in a Heart to Horse box one year.
The trophy is a long standing tradition at our house. Every Christmas eve, all of our kids come home and play Monopoly. And whoever wins gets the honor of putting their name on the trophy for the entire year. I guess it’s kind of a perpetual trophy!
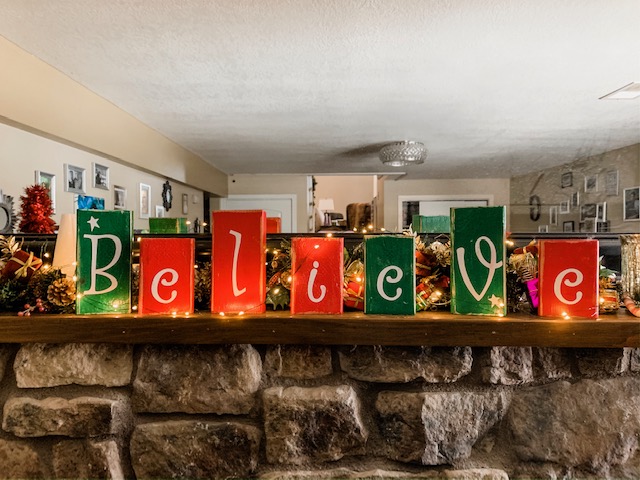
And moving downstairs to our family room, I created these blocks a few years ago with some scrap 2 x 4 wood and card stock paper that I used my Cricut machine. I love that little machine. But I think it’s bout time for me to replace it with one of the newer ones. I would like to have more font options, and not be limited to cartridges. Maybe that is what I will ask Santa to bring me for Christmas this year.
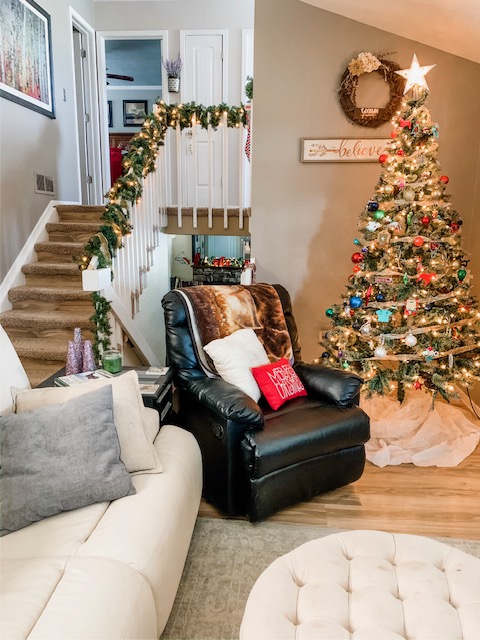
The main level of our home is pretty much all any visitors see, so most of the decorating happens here. My larger Christmas tree is always on the living room.
Along with all of the special Christmas ornaments we have acquired over the years. It may not be picture perfect, or Instagram worthy, but it’s special to me. Really that is what matters the most.
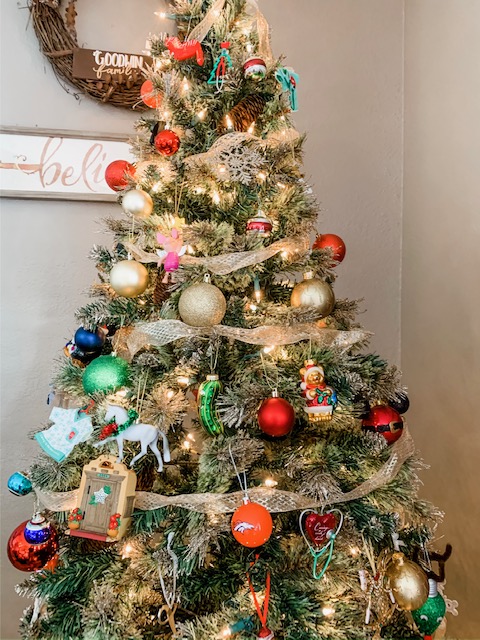
And of course, I have made my fair share of ornaments over the years. And yes, they are horse ornaments! Each year I try and find a horse ornament to add to my collection, or I make one.

I also have a rather large collection of snowmen and Santa’s. And this tall shelf is the perfect place to display them.

And upstairs in our little loft, I decorated as well. Including a tree, and for the first time ever, a Christmas village.
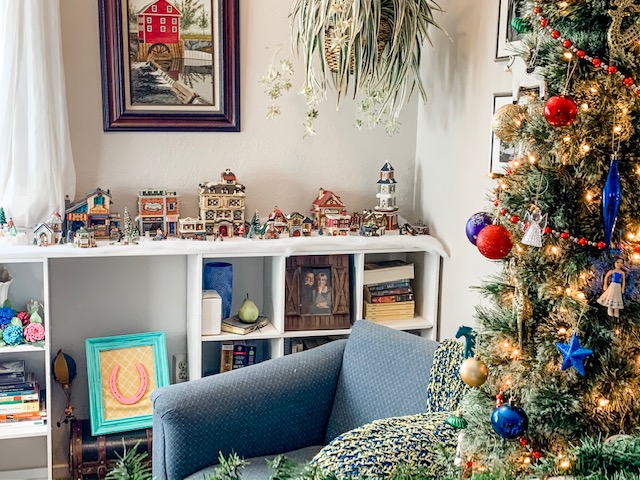
The Christmas village was fun. And I never thought I would have one, or want to add it to my decorating, but a friend of a friend gifted me an entire Christmas village! There are a lot more pieces than I will probably ever use, but it’s fun!
Christmas Decorating – DIY Style
Well, there is my Christmas home tour! Well, more like my Christmas decorations tour, but about the same thing!
And now that this project is done, the Christmas shopping is done, and the presents are wrapped, now I can get back to focusing on more equestrian – style content! I think something fun would be to show you how you could build a horse jump for Christmas. Sound like fun? I hope so, because that is what will be coming up next!
Happy Holidays!