How To Paint A Mason Jar

Lately I have been catching up on artsy-fartsy craft projects that I have wanted to do. And I am working on adding a touch of equestrian type are to some of my home decorating. And having a bunch of horse related items is fine, but I wanted to add some other elements as well. In fact I wrote a blog post about adding equestrian decor, and today I want to show you one element of that design. I had several projects within that post that I made, but I didn’t give the full details of how to do it.
So that’s what this post is. I wanted to share with you step by step how I painted and distressed the Mason jar, just in case you wanted to give it a try. It was a fun project, and very easy to diy.
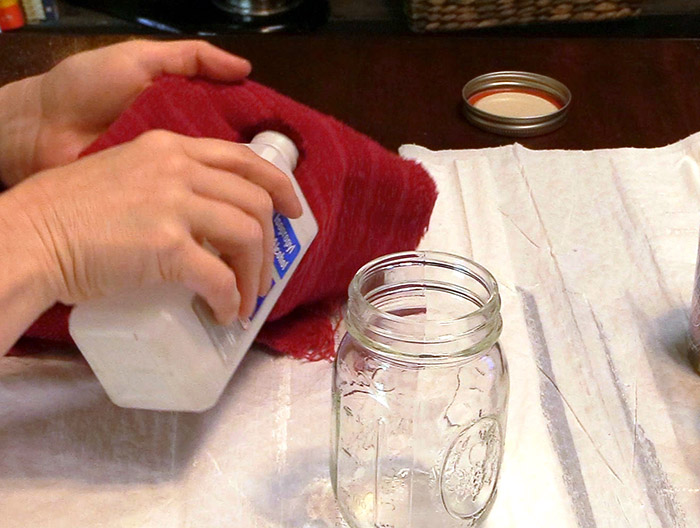
Step 1: Clean The Jars
This is an important step that you shouldn’t skip. Wash the jars with soap and water, even if they are brand new. Once the jars are completely dry, wipe them down with some rubbing alcohol, just to be sure they are sparkly clean.
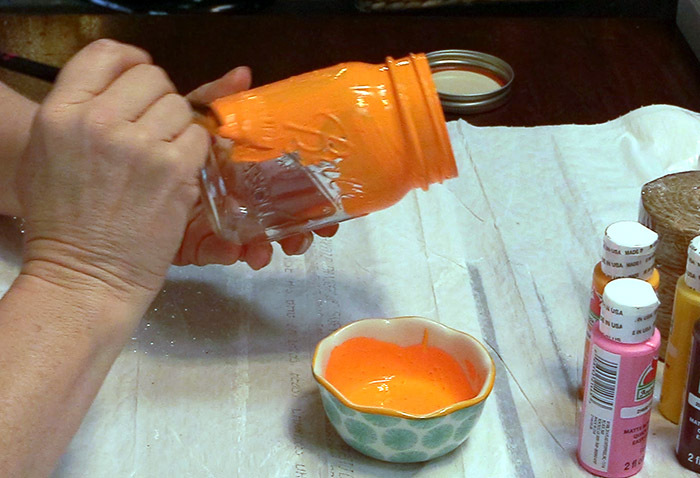
Step 2: Paint The Jars
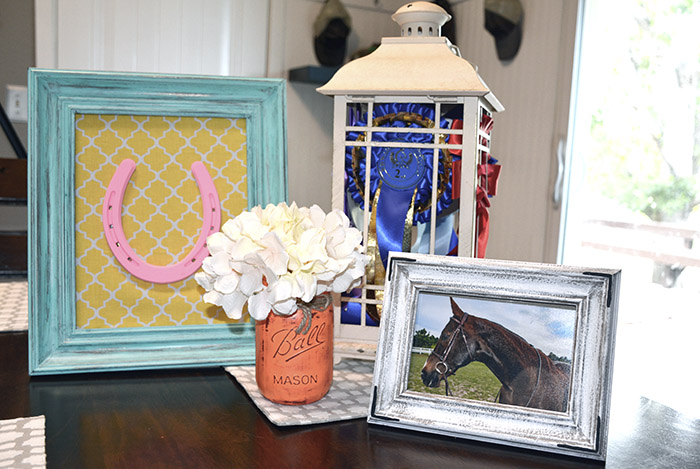
I painted my jar with three coats of a paint mixture I made using pink and orange. I was trying to achieve a similar color to the coral color from this picture:

I used acrylic Apple Barrel paint that I found at Walmart for about $.50 a container. You want to get just the regular finish, not gloss or satin. Just the basic cheap acrylic paint. This will give the final appearance the matte, aged look. And the multiple coats of paint will cover the brush strokes. It is better to do several thin coats rather than one thick coat of paint.
Step 3: Dry Overnight
This is a hard but necessary step. Let the jar dry overnight. This means like at least 16 hours of dry time. No matter how badly you want to complete the project, don’t skip this step!
If you don’t allow the paint enough time to cure, the paint will just peel off when you go to do your distressing. And then you will be distressed too! So find another project to do while you wait patiently for your jar to dry.
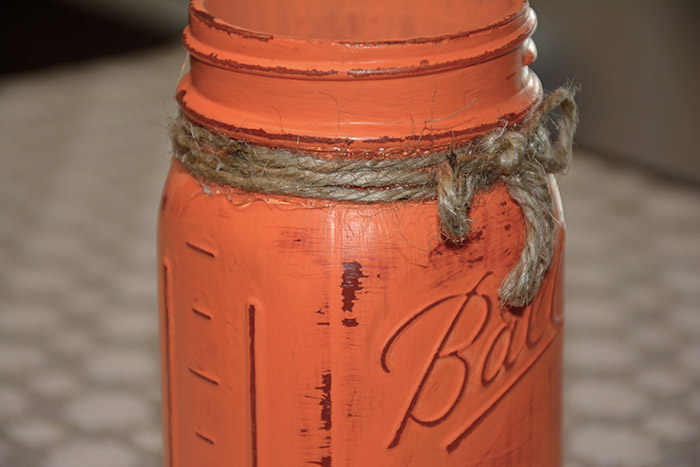
Step 4: Distress The Paint
This is the moment you have been waiting for! It is time to distress your paint! I used a little remnant of sandpaper that I found in the garage, and sanded along the lid threading edges, all the raised type on the fronts, sides, and backs of the jar. And then I added a little more distressing on round edges, for an artistic flair.
I also was having a difficult time with the letters, I wanted to make sure to just get the letters, so I used sandpaper disc’s from my Dremel tool.
Step 5: Seal The Jar
I wanted my jar to have a chalky, and old appearance so I chose a matte finish sealer. And, it was what I had at home, so bonus points for my project. If you want a glossy finish though, that’s fine. Do whatever you like. After all, this is your Mason jar project! So do what makes you happy. I like the matte finish because it helps to disguise the brush strokes of the paint.
Step 6: Add Embellishments
Again, this is just me, but I like a little bit of extras on my jar. I added some jute string just below the threaded portion of the jar. I attached it with hot glue.
And if you want to add some flowers, this is when you can do that too.
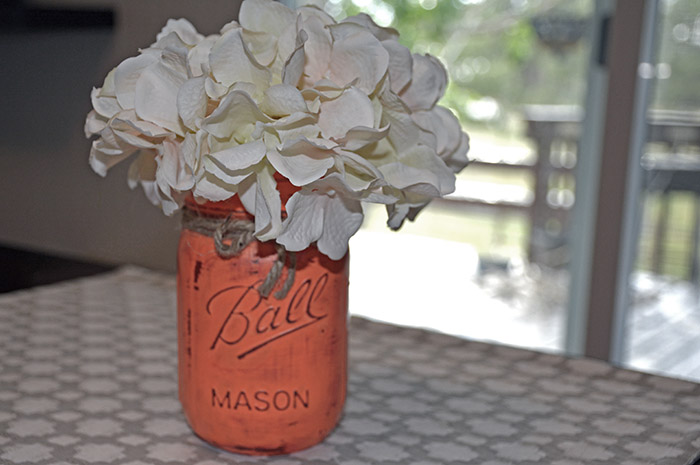
I found these hydrangea flowers on Amazon and I bought 1 of the 7 pieces that I cut down to fit into the jar.
Step 7: Enjoy Your Jar
Now decide where you want to set your jar. If you made several, you can set them up in a display, or whatever you like. I only made one, because I only needed one. But I wanted to share the process with you, so you can see it really is an easy project to do.
You can buy them already finished if you prefer. But for me, that really wasn’t an option. Why buy them for like $10.00 a jar when you can make one for around $3.00?