My Ear Bonnet Obsession
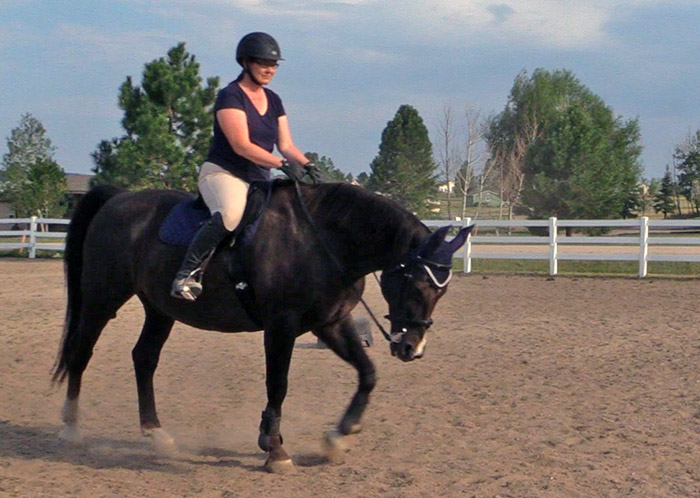
My latest obsession in tack is ear bonnets. And from the first time I used one, I noticed a difference in the way my horse was acting when I rode him. He wasn’t flinging his head around as much, and he seemed quieter. And this wasn’t some fancy-schmanzy bonnet with sound absorbing qualities. No, this was a $10.00 ear bonnet that I bought.

It looked really nice on, but the real benefit was how my horse acted while wearing his new piece of clothing.
From the first time I put on the ear bonnet, I was impressed. And I also wanted more ear bonnets. Especially since they are so affordable. You can find ear bonnets from $7.00 all the way up to $85.00, depending on how fancy you want to get. The most I have spent for an ear bonnet was $43.50 from Dover’s.

But I have since found a lot of different colors available on Amazon, and they are even less expensive. You can find many different Le Mieux colored ear bonnets for about $33.00! If I would have been patient, I could have saved money. Lesson learned.
Displaying Your Ear Bonnet Collection
And instead of throwing the bonnets in a bin when I was done riding, which I did for a long time, I wanted to have a way to hang the bonnets. So this morning I had the genius light bulb moment, seriously it was like a giant light bulb went off over my head. I thought of a way to make a hang up for my bonnet collection.
I already had everything I needed to make it, so I decided this would be a fun weekend project. And I thought you might be looking for a way to hang up your own ear bonnets, so I thought I would share my light bulb moment with you.
How To Make An Ear Bonnet Hanger
To make this ear bonnet hanger you will need a piece of wood, some wooden dowels, and some paint. If you want to duplicate what I have made, this is what you will need:
- 1″ x 6″ x 48″ pine board
- 3/4″ wooden dowels
- 3/4″ spade bit (Or a door hole set – like I happened to have)
- 1/4″ drill bit
- 18 volt drill
- Sandpaper
- Gorilla glue (or wood glue)
- Chalk paint
- Antiquing wax (clear and dark)
And that’s it! Not a lot of stuff right? And if you are anything like me, you probably already have all of this stuff in your garage, or workshop.

The first thing I did was place a bonnet on a piece of wood to see how long I would need it to be. Right now, I only have a handful of bonnets, so I just wanted to make this for what I currently have.

Then, I took the wooden dowels, cut them down to 8″ long, and placed them about 4″ apart above the wood. These dowels are how the bonnets will hang on the wall rack.

Next I had to drill into the wood for where the dowels will be placed. And I wanted them to be at an angle, but I wasn’t quite sure how to make that happen. They do make fancy tools that do this, but I don’t have one. So I made due with what I already had, which was a set that we bought to drill holes in blank doors. It happened to work fantastic. The holes ended up being a little larger than the 3/4″ dowels that I had, so all I had to do was angle the dowel when I attached it to the piece of wood. I love it when things work out!

Sanding The Pieces
After everything was cut out, and my ear bonnet was safely put away, I sanded all of the pieces of wood. This included the 1″ x 6″ wood and the dowels. When I was sanding the dowels, I sanded one end really well. I did not want any splintered wood that might cause damage to my ear bonnets. So I really made sure they were sanded well.
Painting The Pieces
Then after putting the pieces together, and being happy with how the pieces would sit, I painted all of the bare wood BEFORE I assembled it. It is a lot easier, and faster, to paint the wood before the rack is assembled.

And once the chalk paint was dry, then I applied a coat of clear wax, and then a coat of the antiquing wax. I am so obsessed with chalk paint right now. Ever since I made a couple of farm house style decoration pieces for inside my home, I have decided to do this in my tack room as well. I just love this look!
Assembling The Ear Bonnet Rack
After all of the separate pieces had dried, then I put all of the pieces together. I secured the wooden dowels with a little bit of Gorilla glue, using my glue gun. I also drilled 2 small holes for the screws to go on the top of the rack so I can hang it up. The 2 starter holes for the screws will allow me to hang the rack on the wall without splitting the wood. This is a very important final step which should not be skipped!

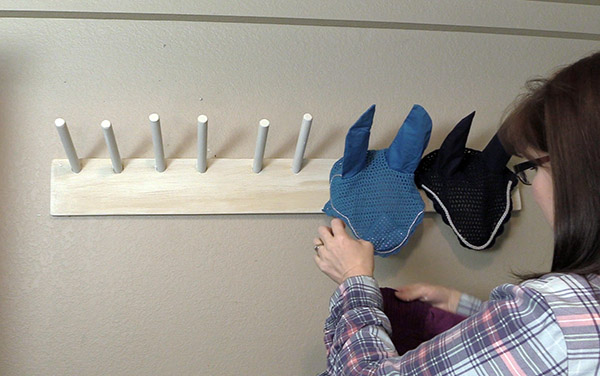
The Finished Ear Bonnet Hanger
And this is the finished project! All of my ear bonnets are hung up, easy to find, and ready for use. I am so so SO happy with how this turned out. And honestly, I am shocked that I haven’t seen this before on Pinterest, or in stores for sale. Don’t people want to hang up their ear bonnets? I do! I like to see what I have, and make the most of the space that I have.

Maybe this will help you, and give you an idea of how to display your bonnets, while making them easy to access. Not only does it show off your collection, but with the way the bonnets hang, it also helps them to dry out after they have been used. Hopefully this will make the bonnets last longer too.

Maybe one day I will tackle the project of making my own ear bonnets, but for now I am happy to buy them, and then hang them up.
Ear Bonnet Hanger Video
And since I haven’t seen anyone else doing this (yet) I thought I would make a video showing you how to make this too. You know, in case you are a more visual learner. You can watch the video below, or you can go to my YouTube channel, and watch all of my DIY tack room projects.

And as always, I do have a few affiliate links within this post. And if you click on a link and make a purchase, I may receive a small commission from the purchase you make. It doesn’t cost you anything, and it helps me to continue doing what I do on my blog, podcast and YouTube channel.