
As we all sit at home, mainly because we have been told we have too, I choose to stay positive, and find something good to work on. And since I have lots of pine cones where I live…..

I thought I would recycle said pinecones and make some holiday decorations with them.
Holiday decorating makes me happy. And crafting makes me REALLY happy. So I decided to make myself really happy and make some easy DIY pine cone crafts for the holidays. And this all started because of my mom. She decided that we should have a crafting day, so my daughter came over, and my mother, and we sat on my back porch, and made some pine cone trees for Christmas.
I can’t tell you how awesome it was to sit with my family and craft. And guess what? None of us got COVID. Nope, we sat outside, together, less than 6 feet apart, without masks on, and we are all still healthy. Sorry for my little rant, but I am so over this whole COIVD thing. But let’s get to the crafting shall we?
Pinecone Christmas Tree
This is what started the pinecone bonanza. My mom wanted to make pine cone Christmas trees. So she made the cages, and I collected the pine cones. And the first ting I learned was that pine cones don’t fall in the fall. Nope, they fall in the spring. So last spring, up until now, as the pine cones fell to the ground, I collected them.

And collected them, and still collected them. I wasn’t sure how many we would need, so I made sure to get the prettiest ones as they fell to the ground.
And it was a bountiful harvest of pine cones.
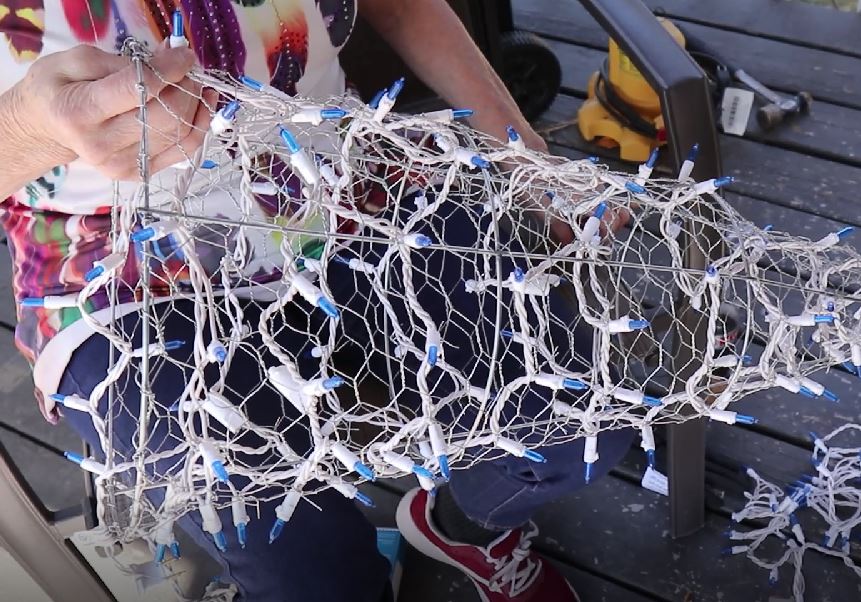
But it isn’t just the pinecones we needed. No, the pine cones are an important part of making the trees. But the most important item is a tomato cage. The tomato cage (turned upside down) is the skeleton of the tree. Our cages are 33″ tall.

Then you wrap that cage with chicken wire. This is what you will wire the pine cones and the lights too.
So my mom did the hard work of attaching the chicken wire to the tomato cages.
Easy DIY Pinecone Crafts

Then we took 2 strands of outdoor Christmas lights, and pushed them into the cage. This was challenging, especially at the beginning. You start by pushing the lights to the top of the cage, and then work your way down, attaching each light to the cage with 22 gauge floral wire.
It gets easier as you get to the bottom of the cage.
And once you have the lights inside, then you attach pine cones to the tomato cage. You start at the bottom, and attach each pine cone with wire. The higher the gauge of the wore, the easier it is to bend around the pine cone, and tie them onto the cage.

You work your way around the cage, and stack the pine cones layer after layer until you get to the top.
A word of advice, wear gloves. The pine cones are very pokey, and sharp. Well, the ones I collected are. And I found that my riding gloves were the perfect amount of protection while still allowing us to use our hands well as we attached the pine cones.

Keep the pine cones as close as you can so there aren’t lots of blank spaces around the cage. I found this out the hard way. I thought if there were blank areas, I could just hot glue pine cones in place. Nope! The pine cones don’t like the hot glue very well, and they wouldn’t stay in place. SO I had to find smaller pine cones to fill in the empty spaces.
Once the pine cone tree was complete, I was able to use my glue gun to glue on some ornaments.
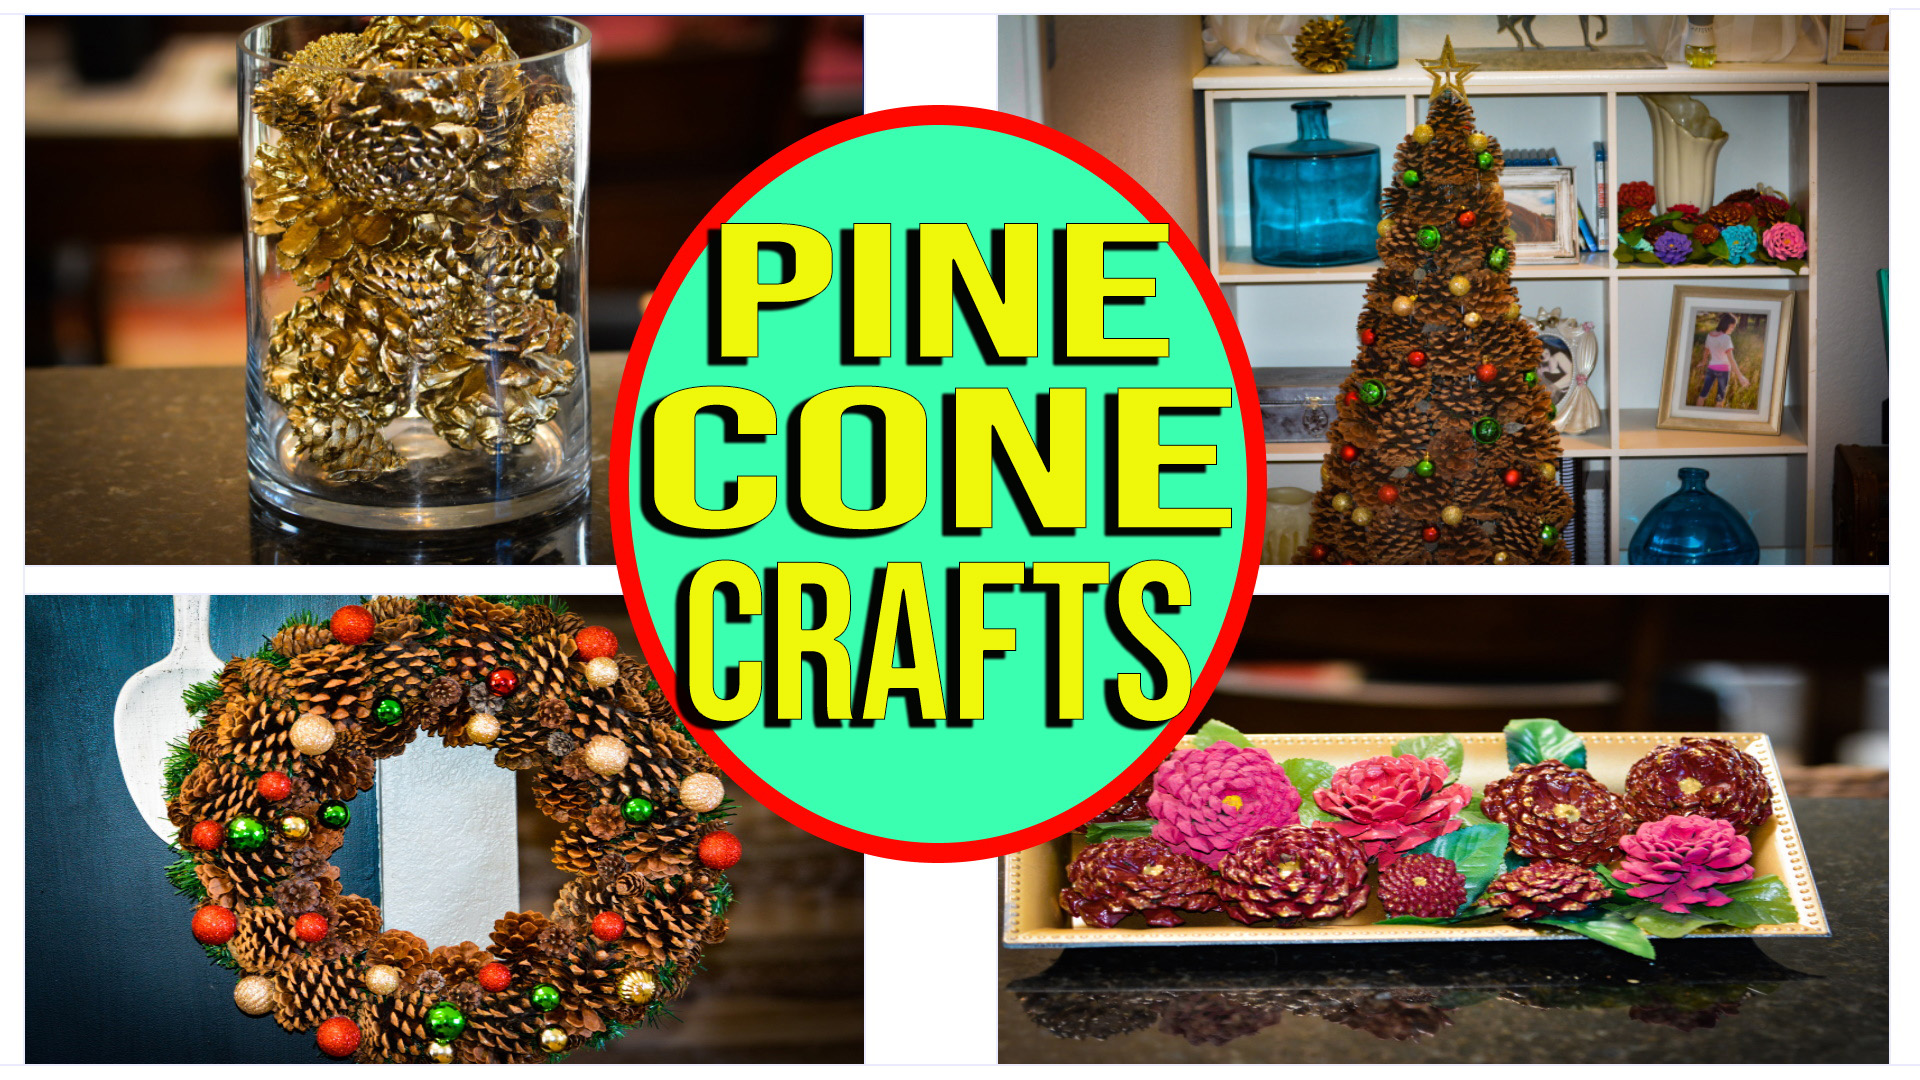
This is the end result of my pinecone Christmas tree:

I am really happy with how it turned out. But I think I like it more without the lights turned on.
Pinecone Flowers
After we had completed our trees, 3 total trees made, I still had bags of pine cones. And I didn’t want to throw them away, so I decided to make some Christmas color pinecone flowers.
I had some white paint, and some red paint, as well as gold. And then I added some leaves from silk flowers to really make them look like flowers.

Finding the perfect pine cones to turn into flowers was part of the process. Only very specific pinecones will work. You need to find pinecones like the ones below in order to make really cool ‘flowers’. But cutting the pinecones into the size I needed as the most difficult task.
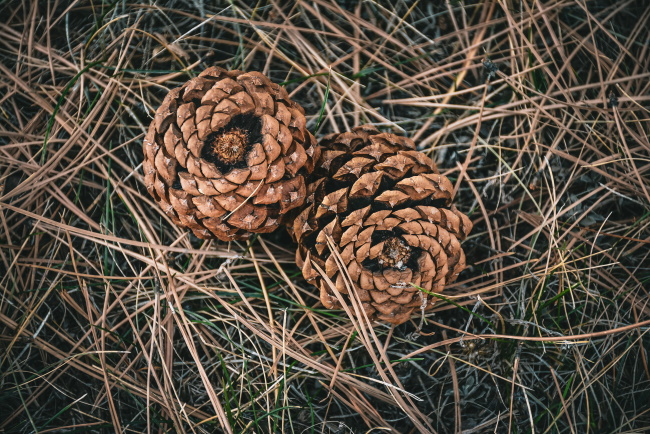
I used a big nipping type tool to cut them down to the size I needed. I also wore gloves, because well, these pinecones are sharp!

But the end result made the difficulty worth it. I have some cute little pinecone flowers that cost me nothing to make, and add an element of holiday cheer to my decorating.
Easy Pinecone Wreath
Of all of my pinecone projects, this one was the easiest. I thought it would be the hardest, but that was before tackling the tree. The tree proved to be the most challenging craft. But thankfully the wreath, well that was easy.

And what made this the easy project was that I started with a wreath base for my wreath.

I decided to do it this way because pinecones don’t stick very well to cardboard, which is what I had originally planned to have for my base. I found that the artificial foliage was great for getting the pinecones to adhere too.

It was a little time consuming, but I just went in layers with the pinecones. I started with the first circle of pinecones, and then added on from there.
And once I had filled all of the sparse or empty spaces with pinecones, I added some plastic ornaments too.

I haven’t decided if I will add a bow. I think I might as I look at this photo. But overall, I really like how it turned out.
Easy DIY Pinecone Crafts

I still have bags and bags of pinecones left. I know my daughter want’s to do some crafting with them. And my son is getting married in March, so maybe we can incorporate some into the decorations.
But I am still looking for easy DIY’s I can do with the leftover cones. Do you have any ideas? What other crafts can be made with pinecones?
If you are a more visual learner, I did make a video showing how I did these crafts step by step. No, it isn’t a horse or equestrian related video for my channel. But sometimes it’s fun to mix things up, don’t you think? Last year I wrote about an ornament wreath that I made. And if you are in the crafting zone for Christmas, you might want to read that post too! Happy crafting!