
DIY wedding photgraphy – capturing memories is something you can do. When you are planning a wedding, one of the most important things to think about is the photography. The photography is so important because the photos will help you to remember that special day.
And if you already have a photographer for the big day, that’s great! My daughter and her fiancé (now husband!) had professional photographers. But you know I had to bring my camera too. And I didn’t do it because I didn’t trust that they wouldn’t be able to get great photos. I knew they would, they are the professionals.
But I wanted to capture some of my own photos not only for myself, but in order to put together a wedding gift for the bride and groom after they return home from their honeymoon.
And since I am the mother of the bride, I get full access to the bride, before the couple says, “I Do.”
The Wedding Preparation
The week before the wedding, Katie, my daughter came home. YAY! It’s like I have my girl for the last week before she becomes a wife.

This gave me a lot of opportunities to capture some memories before the big day.
Things like putting together the decorations

Or even texting her soon to be husband while eating breakfast.

These moments will not happen again. And I want to remember them.
The Wedding Rehearsal
I also have access to the bride and groom the evening before the big day. So the paparazzi within me comes out yet again.
Candid photos are my most favorite to capture
Especially when the couple doesn’t realize they are the subjects of my photos.

Capturing candid moments are special, because they aren’t stiff, or rehearsed.

We all know what it’s like to stand in front of a camera and force a smile. I don’t know too many people who enjoy having their photo taken.
But the professional photographer isn’t going to be available for all of these moments that lead up to the I do moment.
The preparation, the emotions, everything that happens before we arrive at the venue for the celebration, these are the moments I feel are worth capturing.
DIY Wedding Photography Tips
If you are planning on capturing some special moments, or want some pointers on how to do your own wedding photography, keep reading.
The Equipment
Your camera gear will set your photos apart from images shot with a phone camera. But, that being said, phone cameras are pretty great nowadays. And there have been some incredible photos taken with an iPhone. But I guess I’m old school. I prefer my DSLR camera to my iPhone.
The Camera
I don’t have anything fancy. I wish I did, but I don’t. My go to camera is a Nikon D7100. They don’t even make this camera anymore. But, you can find them relatively affordable now because it’s older.

But this is a fantastic consumer DSLR camera to get started with.
One tip I can give when you are taking photos, if you have the capability to take JPG or RAW images, opt for RAW. They are bigger files for sure, but it gives you the most artistic freedom. Which, is pretty important if you are capturing wedding photos, right?
So as my favorite photography instructor, Jared Polin from Fro Knows Photo always says, shoot RAW.
Which leads me to the camera settings. You can shoot in auto, which means the camera does all the thinking for you. And if this is your first time attempting to shoot a wedding, you might want to stay in auto. Otherwise you will end up with a lot of blurry, and useless photos.
Or, you can practice shooting in manual. Take the time to get to know your camera. Learn all you can about shutter speed, ISO, and aperture settings BEFORE you commit to shooting a wedding! Like I said before, I have learned a lot about taking photos by watching Jared Polin’s YouTube channel. And I have also bought some of his DVD’s. My favorite one is called The FroKnowsPhoto Guide to Getting Out Of Auto. It is worth the investment of $19.99 on Amazon.
The Lens

The camera is just one piece of this puzzle. The lens is what makes the difference. And my go to lens that I use more than any other lens is the Nikon AF-S DX NIKKOR 18-140mm f/3.5-5.6G ED Vibration Reduction Zoom Lens. Wow, that’s a mouthful! But I love this lens because of all the options it gives in one piece of equipment.
This is such a versatile lens. You can get close up photos as well as wide shots without switching lenses. And for a zoom lens, its very affordable.
Don’t let the lower cost of it scare you away. This lens is a powerhouse. It provides a nice Bokeh (blurred background) while getting tack sharp edges to the subject. If you are shooting with this lens, you will have to work very hard to get a bad photo.
The lens works very well in low light situations. Which let’s face it, most weddings seem to be low light scenarios.
So if you are getting started in photography, and want a great all purpose lens, I would consider investing in the 18-140 mm.
Memory Cards
Don’t forget to have a couple of extra memory cards too. You don’t want to run out of space on your cards, and then have to sort through images to try and delete. Memory cards are cheap now, buy a few extra.
Just as an example, I bought this 64GB card for less than $12.00.

If you are shooting RAW (and you should be) the file sizes of the photos will be larger. For example, on my 64 GB card I will get about 800 photos. If I switch that to JPG, I can capture about 3500 photos. But the quality will be compromised. And with taking photos at a wedding, I do not want to take that chance. So RAW shooting it is!
Which means it’s a good idea to have a few extra memory cards. You never know what you can capture through the end of your camera. So be prepared and have extra cards.
A Tripod
Now for me, I am not using a tripod, because I am just capturing random moments. And I’m not the wedding photographer. But if you want to get the best still photos, the best staged photos, like group photos, you should have a tripod.
I have several tripods. And let’s be honest, I abuse the crap out of mine. So having a sturdy tripod should be a priority. I mean, it is for me.
A good tripod is not going to be cheap. You can’t expect quality from something that costs $10.00. And a good tripod will last a long time. Even if you abuse it like I do. I bought my favorite tripod on Amazon for around $79.00. And while it isn’t the best of the best, it is sturdy and it’s able to withstand the abuse I give it.
Finding The Moments
Ok, now that I have shared a little bit of the equipment I love to use, let’s get into some photo opportunities.
I have already talked about the pre-wedding moments. But now, we are at the big day, the wedding day! And if you are going to a venue, or event center for the wedding, you will have hundreds of opportunities to capture memorable moments.
There is the venue itself

The getting ready process

The bride

The groom

The flowers

The ceremony space

The guests

The ceremony official while he is preparing for the ceremony. Who just happens to be the father of the groom.

The food

The ring that started it all

The ceremony itself. For me, this is the most important thing to capture.

Because this is the moment when the two become one. And Since they are in the moment, I want to have shots that they can look back on in the future.

The first kiss as man and wife. This is such a fantastic moment to capture, but it can be challenging to get just the right shot. I think I nailed it.

And I have to thank the grooms mother for the switch up in the seating arrangement. Otherwise, I would have never gotten this photo.
You see, the brides family sat on the right side of the ceremony. While traditionally the brides family sits behind the bride. However, to be able to see the bride’s reaction to her groom, and to be able to watch from her perspective, this was a wonderful change.
I’m not sure most people would consider this, but I can tell you being able to see my daughter’s face during the ceremony is a memory I will keep with me forever. Along with all of the great pictures I was able to get!
And in order to capture the moments, you need to have an idea of what you (or the bride and groom) want captured. So come up with a shot list. A shot list is basically a list of different photos that you want to capture.
Before the wedding, I made a list of the photos I wanted to shoot.
The groom with his family

The groomsmen

The couple with the grooms family

The back of her dress

The first kiss
The bride and groom together

The bride and groom sharing a moment before the ceremony without seeing each other

The bride with her bridesmaids

The cake

And again, I could go on. But the main point is to make a written list of every shot you want to capture, along with any shots the couple would really like to have.
For the bride and groom, they are so focused on the moment, the wedding, and making sure everyone is having a good time. They will not get to see everything that you do from behind your camera. So it’s important to capture as many moments as you can, so they can ‘see’ what they missed from their own wedding!

I’m lucky, my daughter is used to my paparazzi moments. I have been taking pictures of her since she was little. So she is very familiar with the sound of the shutter clicking over and over. I am fortunate for that!

Editing The Memories
Ok, now that I have shown you some actual photos that I captured at my daughter’s wedding (YAY!) I have to be honest and tell you, the photos did not come out of the camera like this. What??!?!?! I know, shocker right?
But I rely on the editing software made by Adobe. It’s called Lightroom. And with Lightroom, I can edit the original photos and turn them into whatever I want.
I love Lightroom. I can take one photo and turn it into several.
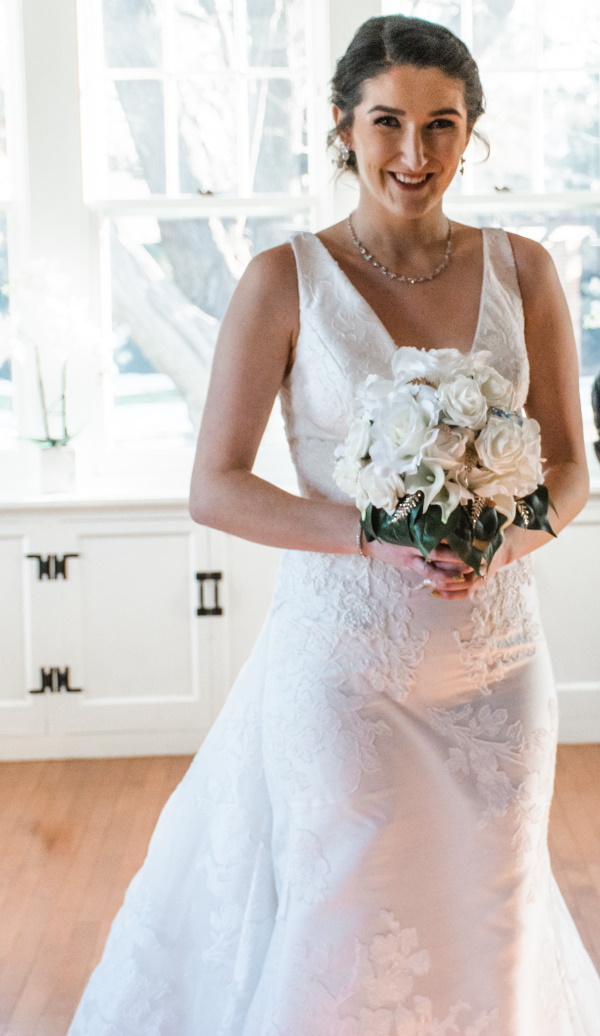
For example, here is one photo that I took:

This is just the image itself, in all of it’s original glory.
Then, with a little bit of tweaking in Lightroom, it becomes this:

Pretty cool huh? After editing, this is one of my favorite photos I was able to capture of my daughter. I love this image. She looks so happy! And I caught it!
The editing is where the magic happens. And sometime when you have a cool photo that isn’t quite sharp enough, or something just isn’t right, or you totally blow the shot, you can save it in Lightroom.
This is why it is so important to shoot in RAW. It’s a lot easier to tweak a RAW file versus a JPG.
Lightroom can be purchased, or you can use the software in Adobe’s creative cloud. This is what I do. I have the entire Adobe suite though, because I use a lot of their programs for my video production too. But for me, it is worth it. For Photoshop and Lightroom only, the monthly subscription is $9.99 a month. And it is well worth it.
If you want to get the most out of your photos, consider Creative Cloud. It’s amazing! Photoshop is incredible, but there is a bit of a learning curve. Lightroom on the other hand is very easy to use.
DIY Wedding Photography – Capturing Memories
Well, there you have it! A crash course in capturing memories at a wedding. I hope you enjoyed the wedding photos that I was able to capture, as well as got some advice on how you can take incredible photos yourself.

And while I am not a professional photographer, I am happy with the images. Adding these to what the professionals were able to capture, well, I think the newlyweds will have a lot of photos for their scrapbook!
I wanted to do something special for the bride and groom after the wedding. You see, all of the gifts were sent to our home. And when we got home, and the bride and groom were celebrating their union, I got to work putting together one last surprise for them.

I took all of their gifts, and some of their decorations, and made a little display for them.

I also went to the Dollar Store and bought a few frames while I had ordered a few prints from the one hour photo place. Then I took those newly framed photos, and dispersed them throughout the gifts. This way the couple has a few photos already done to take home with them, along with their gifts.

Then if they want to keep the photos, they can, or they can replace them with new memories as they begin their new life as a couple. I hope my daughter isn’t reading this right now, because she doesn’t know I did it, yet. If you are reading this Katie, happy times for you and Seth!
DIY Wedding Photography – Capturing Memories
DIY wedding photography really isn’t hard, it just takes time to figure out your style. And honestly, all photo enthusiasts create a style of taking photos. It just takes time, and practice to develop. But with practice, beautiful images will be the end result.
So what are you waiting for? Get your camera, and get out there and practice!
1 Response to "DIY Wedding Photography – Capturing Memories"
[…] creative with your photo sessions by incorporating elements unique to the farm. Pose on an antique tractor for a touch of whimsy, or arrange for a few shots with the farm animals to add a playful and memorable dimension to your […]