
Day 3; Building Rails for Your Horse Jumps
Here we are at day 3 already! How is it going for you so far? If you have been following this series, so far you would have gotten all of your materials, and created the standards for your jumps. Pretty exciting don’t you think?
And day 3 is no less exciting! Today we are going to create poles that will be an important part of your jumps. Crafting horse jump rails is labor intensive, and if you do not have experience using a circular saw, today is going to be a little bit harder. If you have someone who is comfortable with power tools, and using a circular saw, enlist their help. I do, I have my husband cut the rails for me. This is one area I am just not comfortable with yet, so thankfully, my husband is amazing, and he will cut my rails. I hope you have someone as supportive to help you with this. And once they see how happy you are with your jumps, they will be very glad they helped out!
Seriously, if you are not comfortable with doing this, look for options. You could make 8 foot poles using the landscaping timbers, or you can give it a go, and remember, it will get easier each time you do this!
Creating Jump Rails With 4 x 4 Wood Posts
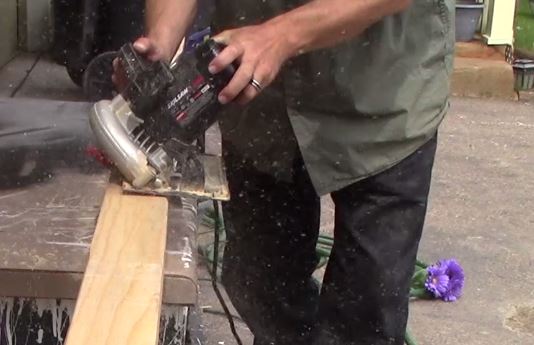
To get started, you will take one of the 4×4’s and secure it to a hard surface. We use a movable counter top/cabinet set up that we take outside to cut the rails. (When I say we, I mean my husband!) You can secure it to the hard surface by using a vice. This is attached about half way down the 4×4. Once it is secure, you are ready to cut the wood.

You will be cutting the corners off, at a 45 degree angle. So you want to tilt the bed of the saw and secure it at a 45 degree angle. It is important to secure it, because if you don’t, it may shift, and move creating a deeper cut in the wood.
You will start at one end, and go all the way down to the other end. When you get to where you have the lumber secured by the vice, discontinue cutting, and move the vice to behind, where you have already cut. When it is safe to do so, complete the cut. You will do this 4 times per pole. And when you get finished, the pole will look like an octagon from the end, meaning it will look like a stop sign. These work great for jumping, because the poles won’t roll out of the cups, which is a good thing!
You will do this 4 times for each 4×4 that you have. So for this set, of 7 rails, you will be making 28 cuts. I have been trying to think of something creative to do with the wood strips that are made from doing this. And so far, the best I have come up with is kindling for the fireplace (only do this if you are using pine, do not do this if you are using treated lumber for your rails!) and I also have a handful of the sticks that I use for makeshift paint stirrers. They work great for this, especially if you don’t have a paint stick around. And if you have been to home depot lately, now they are charging for the paint sticks! Sorry, but I am not paying for a stick to stir my paint. I will make my own and save that dollar for my materials.
Sanding the Rails
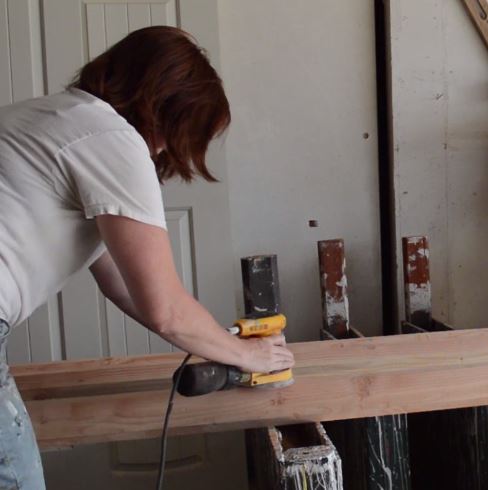
Once you have all of the poles cut, and they look like jumping poles, now you will need to sand them. It doesn’t take a lot of sanding, because the wood is pretty fresh, and should not have a lot of splits in it.

This is also when I use needle nose pliers to remove the UPC code from the end of the pole. You can just rip off the tag, but there will be a staple left behind. And you have already put so much work into these poles, wouldn’t you rather it be perfect? Take the extra 30 seconds, and remove the staple and the tag from the wood. Please don’t just paint over it.
Primer Paint Your Rails
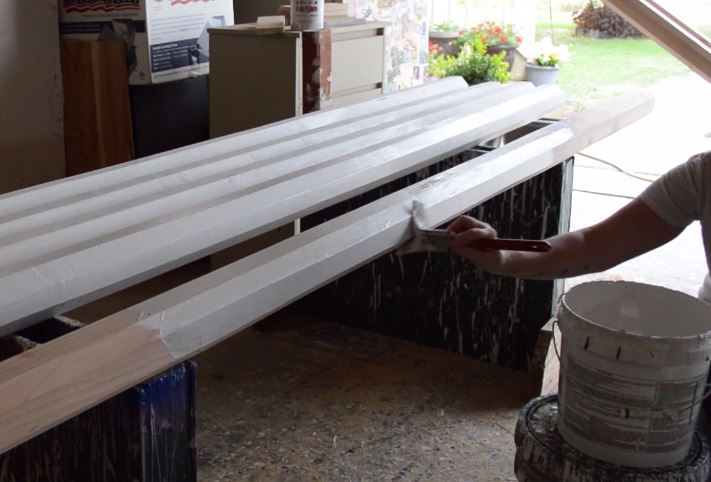
When you have finished sanding the poles, now you can primer (Kilz) paint them. I do all sides of this at one time. Yes, you will get a little bit of a spot that will rub when you turn the rail, but it won’t show up when you put the high gloss enamel over it. When you apply the primer coat of paint, make sure to use thin coats of paint. Don’t slather it on thick, because it will run. Yes, I have attempted to rush, and put extra heavy coats of primer, as well as paint on, and it never turns out well. Just apply a thin coat of the primer, and if you want to apply a second coat you can once the first coat has dried.
Another thing to think about is how to set these 10 foot long poles when you are painting them. Again, I have a set of ‘boxes’ I made (they were actually a long ago attempt at making some fancy wing standards) that I use for many different aspects of building my jumps. I have found these to be invaluable when building and painting the jump pieces. SO be sure to have something like this to use.
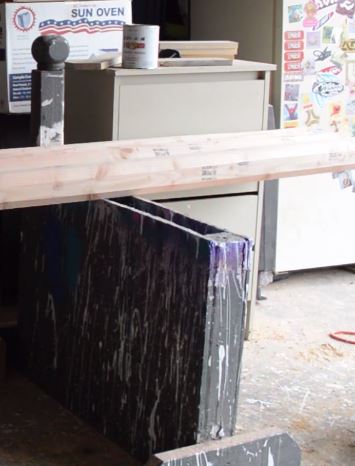
One option that works and I have used in the past is to use buckets, or even paint containers. Anything that will lift the rails off the ground so you can paint them. Something else to keep in mind is where are you going to be painting these? You will get paint splatters and runs, so you want to be sure to protect the ground, or your garage floor if that is important to you (or the man who is letting you use his garage!) As you have probably noticed in my photos is how much paint is on the floor of my garage.
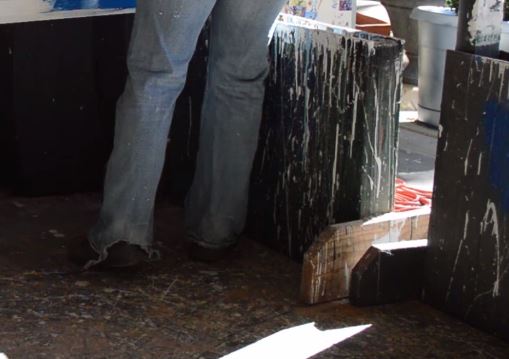
One day when we get ready to sell our home, I will have to do a deep cleaning of the floor, and probably put an epoxy covering over it, to cover up all of the years of jump building that have been done in my garage. I think this is a really important step not to overlook otherwise you may have a very upset spouse, family member, or landlord.
I am hopeful one day we will have a much larger piece of land with a dedicated workshop where I can build my jumps, and not have to worry about what I do to the floor!
Ok, enough of my digressions, back to painting your poles!
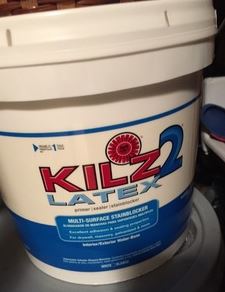
In my opinion, it is a good idea to do 2 coats of primer on your rails. This will give a nice even undercoat of protection to the rails, as well as make your final paint color look even better. The nice thing about using Kilz 2 for the primer is that it is a latex paint, so it dries faster. You can usually put on a second coat of paint in as little as 1 hour. This is fantastic if you only have a limited amount of time a day to be working on your set of jumps.
Painting the Finish Coat
After your primer has dried, you will paint your rails the color you want them to be. For my rails I chose to use oil based enamel. I have found through lots of painting that this type of paint is best for horse jump rails. The paint lasts longer and really hold up to the repetitive moving, and being hit. It also withstands the elements better than latex paint will.

When you paint, use thin coats of paint. Don’t glob it on! It may be tempting to apply thick coats of paint, but then the paint will run, and your paint job will look sloppy. take the time to apply thin coats of paint for a better looking end result.

The paint will take at least 12 hours to dry, so only paint what you can see, then allow to dry for at least 12 hours before turning the rails to paint the rest of it.
Day 3 may seem like it was a fast day with not very many instructions, but it will be pretty labor intensive. So even though there are not a lot in writing, there will be a lot of work. Just take it slow, and do what you can. I have my husband help me cut the poles, and then when I come home from work, I sand them and primer paint them. It really does help a lot to have someone else help you to create this set, especially when crafting the horse jump rails.

If you don’t have the help, it’s ok, it will just take a little bit longer to do. So don’t feel discouraged if you can’t do it in 7 days. Do what you can, and be proud of yourself for what you are accomplishing!
I also made a video of creating the rails on YouTube. You can watch it on my channel, The Budget Equestrian. So far I have uploaded 82 videos on all things related to horses and building jumps.I would be so happy if you would visit!
2 replies to "DIY Horse Jump Rails Building a Set of Horse Jumps"
Do you or your husband have a blade you recommend? My husband tried with our skill saw (following your blog and video) and really struggled to cut the wood. He was using 4×4 treated wood.
Before we give up, I wanted to make sure he was using the correct blade.
Hi Kristen,
On our Skill saw, we just use a wood blade. It isn’t anything fancy, and it is hard work. We have used it so much, the name of it has worn off the blade. But I do remember it is a wood blade, and the teeth are a little deeper. There are less teeth on the blade, and they are larger and have deeper grooves. I know that probably doesn’t help a lot. But I did find the more wood I cut with the skill saw, the easier it got.
~Lisa