
Building Tall Flower Boxes
I finally have found the time to get building some pretty big sets of horse jumps, and I am so excited! I have been wanting to build two complete sets of jumps, one hunter course, and one jumper course, for some time now. And I have drawn out a lot of different jumps, and bought the wood I will need, and the time is finally here when I can begin to build my jumps.
And I thought I would start you off with a quick project to make it easier to ease in to building horse jumps. So we are going to start with build a pair of tall flower boxes.
It may seem really simple, but when you add extra elements to your jumps it helps to emulate what you will see in the show ring. Especially if you are showing in hunter classes, you know that almost every jump in the arena has a lot of fill, and you will see a LOT of flower boxes. To me it makes sense to build some tall flower boxes for the jumps you will be using at home. Besides adding to your jump collection of fill, you can also make a jump with just the flower boxes, if you want to challenge yourself and your horse.
How To Make Tall Flower Boxes
You won’t need very much to build a pair of these boxes, another great reason to start with this project first. And the same holds true for the tools, not very much needed.
What You Will Need
- (3) 2 x 6 x 8′ lumber
- 3″ screws
- 2″screws
- Sandpaper
- Measuring tape
- 18 volt drill
- 1/2″ spade bit
- Circular saw
- Primer paint
- Paint or stain
See, there is not a lot needed to make some flower boxes!
What You Will Do
After you bring your wood to your workshop, you will need to cut the 2 x 6’s. For this set of flower boxes, the total length will be 8 foot long. If you want to make longer, or taller, boxes, choose your wood and your cuts accordingly. But for this example, we are building 2 boxes that are 8″ tall, and 4 foot long.
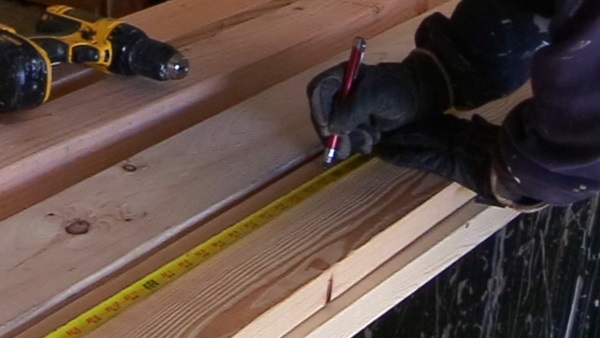
So first, measure on each of the 3 pieces of lumber 48″ and mark the wood.
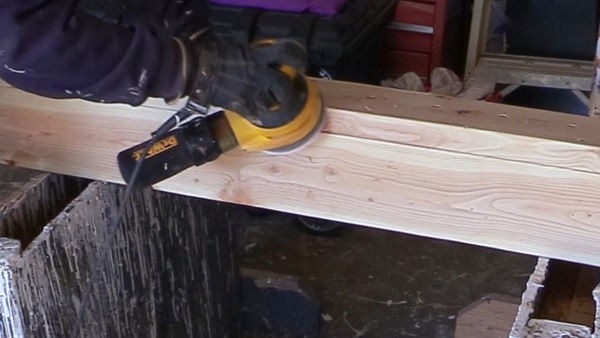
Then you will cut each board. You can use a circular saw, radial arm saw, jigsaw, or whatever you have. I love my radial arm saw, and this is what I use for almost all of the cuts that I need to make.
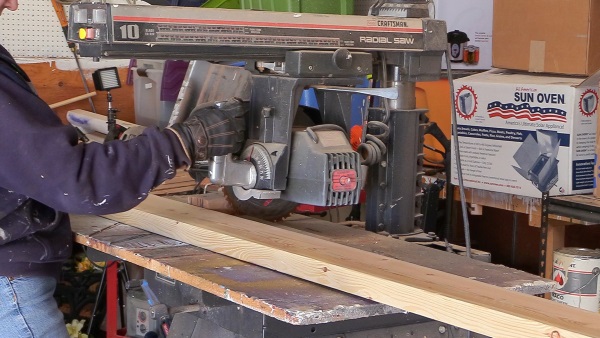
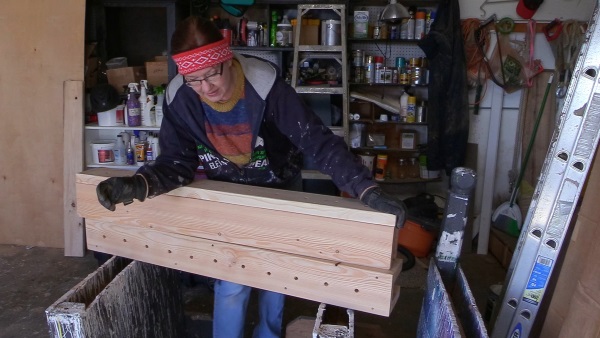
When you are done, you will have 6 pieces of wood, all 48″ long. Now you will take 3 of those boards to build the box. First set 2 of the boards up on their side, and then take the third piece and lay across the top of the other two boards. You want to make a box. Be sure that everything lines up equally.
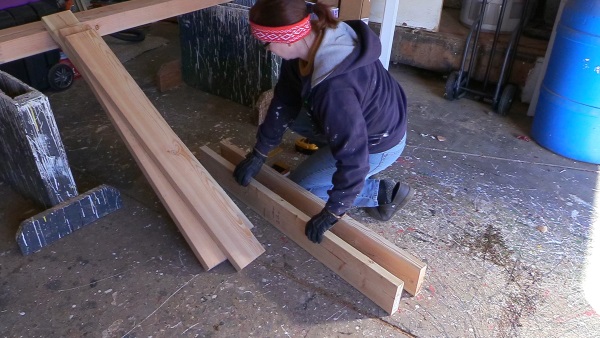
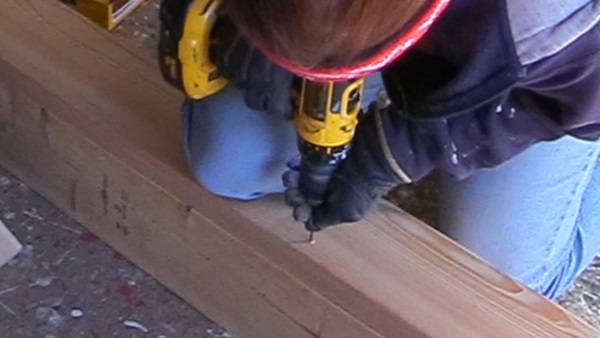
And then attach the boards with a screw. I like to use a 2″ screw, and attach one screw on either side of the top board. And after it is attached, I use 3″ screws on each corner of the top board, connecting it to the 2 side boards. I place 2 additional screws on each side to really make sure the box is secure.
Once you are finished securing the wood together, make the second box.
Now set the boxes side by side, and grab your tape measure. Run the tape lengthwise along the top of the box, and find the center of the box. It should be 24″. And in the center, mark it off. Then determine how far apart you want your holes to be. For my boxes, I marked off every 4″. This means I will have drill holes every 4″ on the top of the box to place flowers.

And after you have marked off the holes, you need to drill the holes. I attach the spade bit to my drill, and drill through each marked hole. I use a 1/2″ spade bit and drill through. It’s a lot of fun honestly!

Once your holes are all drilled, now the fun part of sanding everything smooth. The sanding can be a little tedious, but don’t skip this step. Sanding each side of the boxes make them look finished, and much more professional. So take the extra time and sand the boxes.
After sanding, you need to decide if you want to paint or stain your boxes. Right now the boxes I have are still unfinished, because I haven’t decided what I am going to do. I think I will paint them solid white, which means I will primer paint the boxes first, and then use Rustoleum gloss white paint. And once the paint has had time to dry, all that’s left to do is add some flowers, and set the boxes out.
For the flowers, I will typically go to Wal-Mart and buy the $0.96 bunches of flowers. If I can find them cheaper elsewhere, I will. But Wal-Mart usually has a good selection of flowers.
And that is pretty much it for building a set of tall flower boxes.
It may seem unnecessary, but flower boxes add yet another element to having a complete horse jump. And if you were to buy these from a company, a set of flower boxes will cost you anywhere from $120.00 to $350.00. You could build a complete jump for that. So if you are just starting to build jumps, or are looking for something new to add to your jump collection, tall flower boxes would be an excellent item to consider.
And if you are a more visual person, and do better if you can see how this is done, I made a video of me building the boxes and it’s available over on my YouTube channel, The Budget Equestrian.
2 replies to "Building Tall Flower Boxes For Horse Jumps"
This was super helpful, and we just did this. We made four flower boxes as a trial and figured we would make more, after, once we figured out glitches, if any, My lesson learned: I would recommend using thinner wood, as 2″ wide is overkill and makes the flower boxes very heavy. I want to be able to move them around on my own — one of the reasons I like your design (only three pieces of wood — I thought light and no need to make handles). However, the wood is so heavy, I will still need help setting courses. One piece of feedback – just my two cents!
Thank you for the feedback! I have tried making these using 1 x 6″ lumber, and they just fell apart so easily. They were definitely lightweight, and less expensive to make, but they didn’t work well for me. But, that is what is so great about making your own jumping equipment, you can do whatever you like, and what works bast for you 🙂 I am so glad to know people are actually making their own equipment 🙂
~Lisa